
Creating free printables is a great way to engage your audience and give them valuable resources. But many people don’t know where to start when it comes to creating their own freebies. That’s why in this blog post we’re going to cover the basics of how to use Canva templates to create a freebie printable.
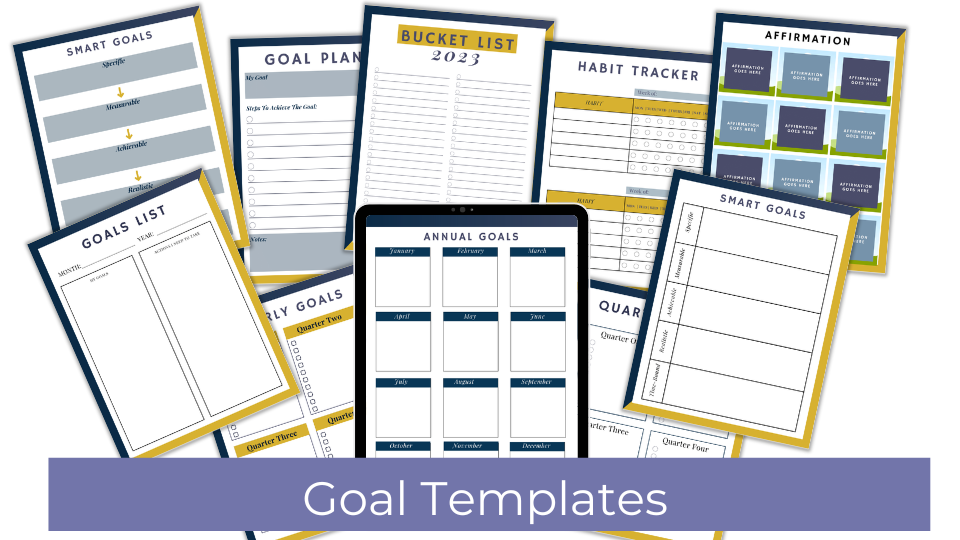
I will be using the Goal Setting Templates from my Midnight Edge Canva Template Toolkit:
You can use any Canva Template that you have and follow the steps below.
In this blog post, I will walk you through how to decide what printables you’ll use as a freebie based on what templates you’re working with, then I’ll walk through Canva Template Basics like taking out all the elements, changing the colors, and changing the font.
Most steps include a screenshot, so you can see how I do it.
Step 1: Decide how you’re going to use this template
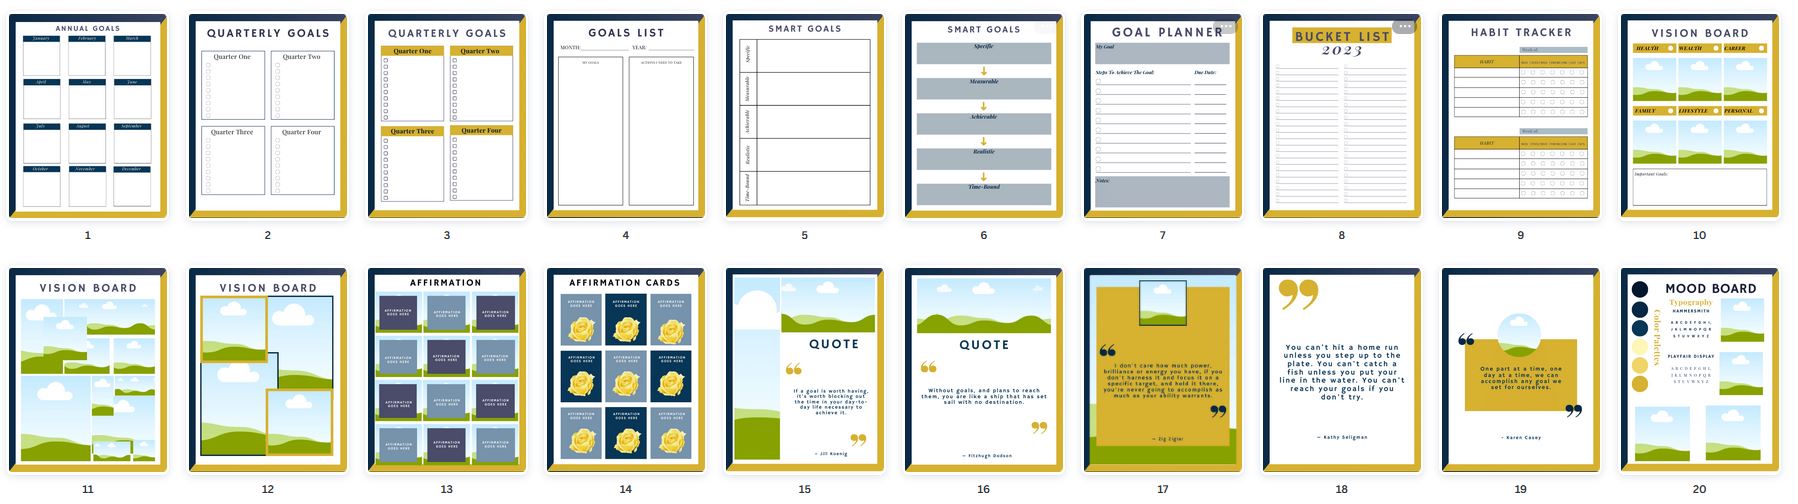
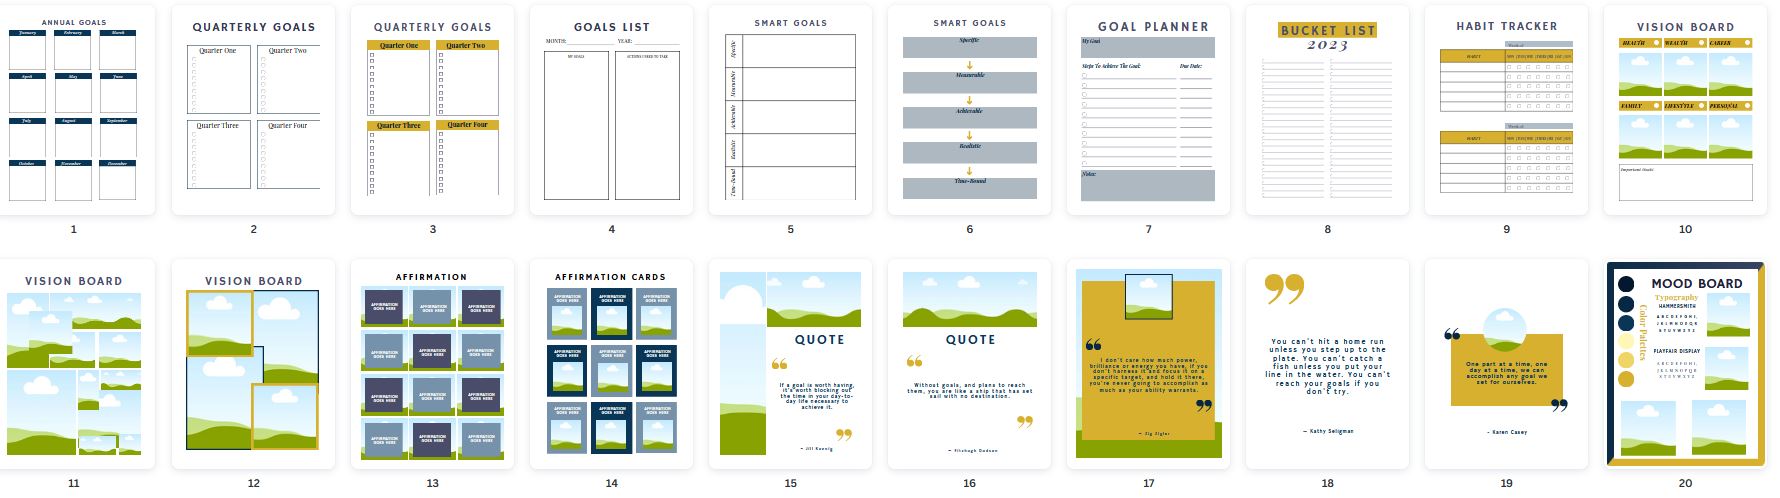
I’ve decided to use a Goal Setting template. In the template, there are page designs for Annual Goals, Quarterly Goals, Goals List, SMART Goals, Goal Planner Page, a Bucket List, a Habit Tracker page, Vision Boards, Affirmation Cards, and Quote Pages.
I could expand on these pages and create a planner or I could take these pages and create printables. I don’t want to do an entire planner, so I’m going to pick option B.
There are several printable options:
- Goal Pages (Annual Goals, Quarterly Goals, Goals List, SMART Goals, Goal Planner Page)
- Vision Board & Affirmation Card Templates
- Vision Board Templates
- Affirmation Templates
- Quote Designs (these can be used as Wall Paper or images on your phone, etc)
- 7-Day Habit Tracker
- Bucket List Brainstorm PDF
I’m sure there are probably more, but this is what I see that I can do right now.
I can literally take this 20-page template and create 7 different freebies or digital products.
I will be creating the Goal Page Printables as a freebie and opt-in.
Step 2: Create a Copy
The first step I take whenever I want to use a template is take a copy. To do that open up the design you’re going to use, go up to File, and then scroll down to “Make a Copy”.
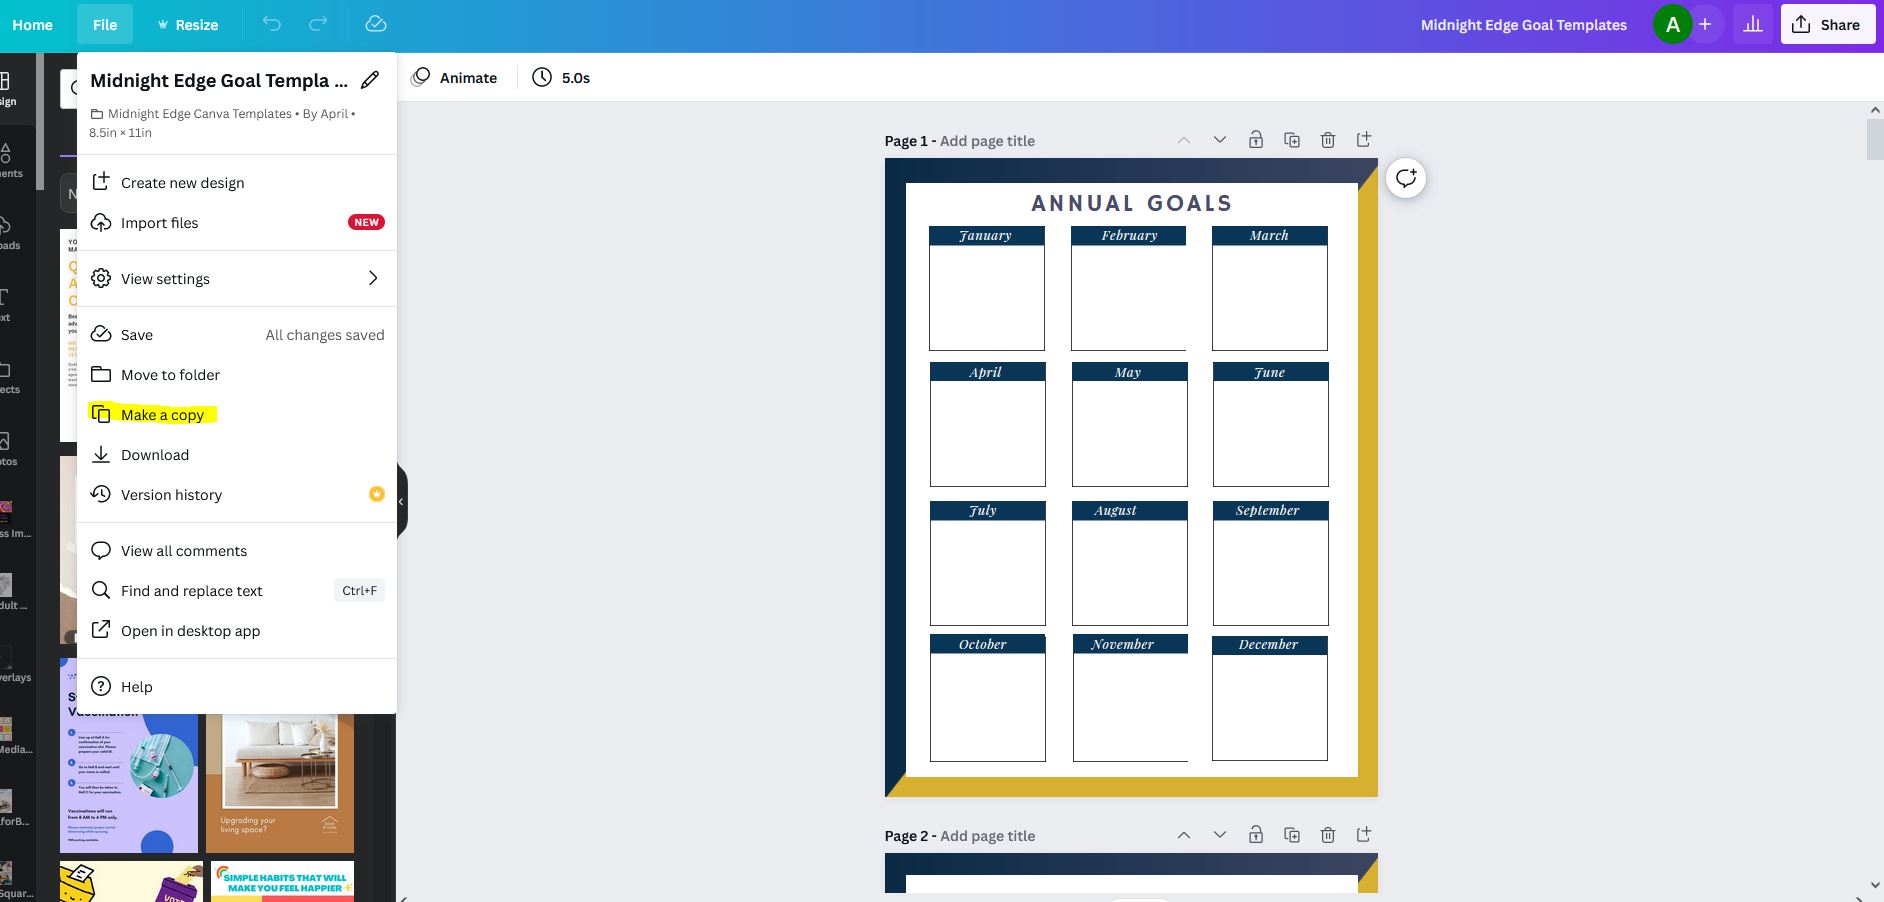
This will give you a copy to work with.
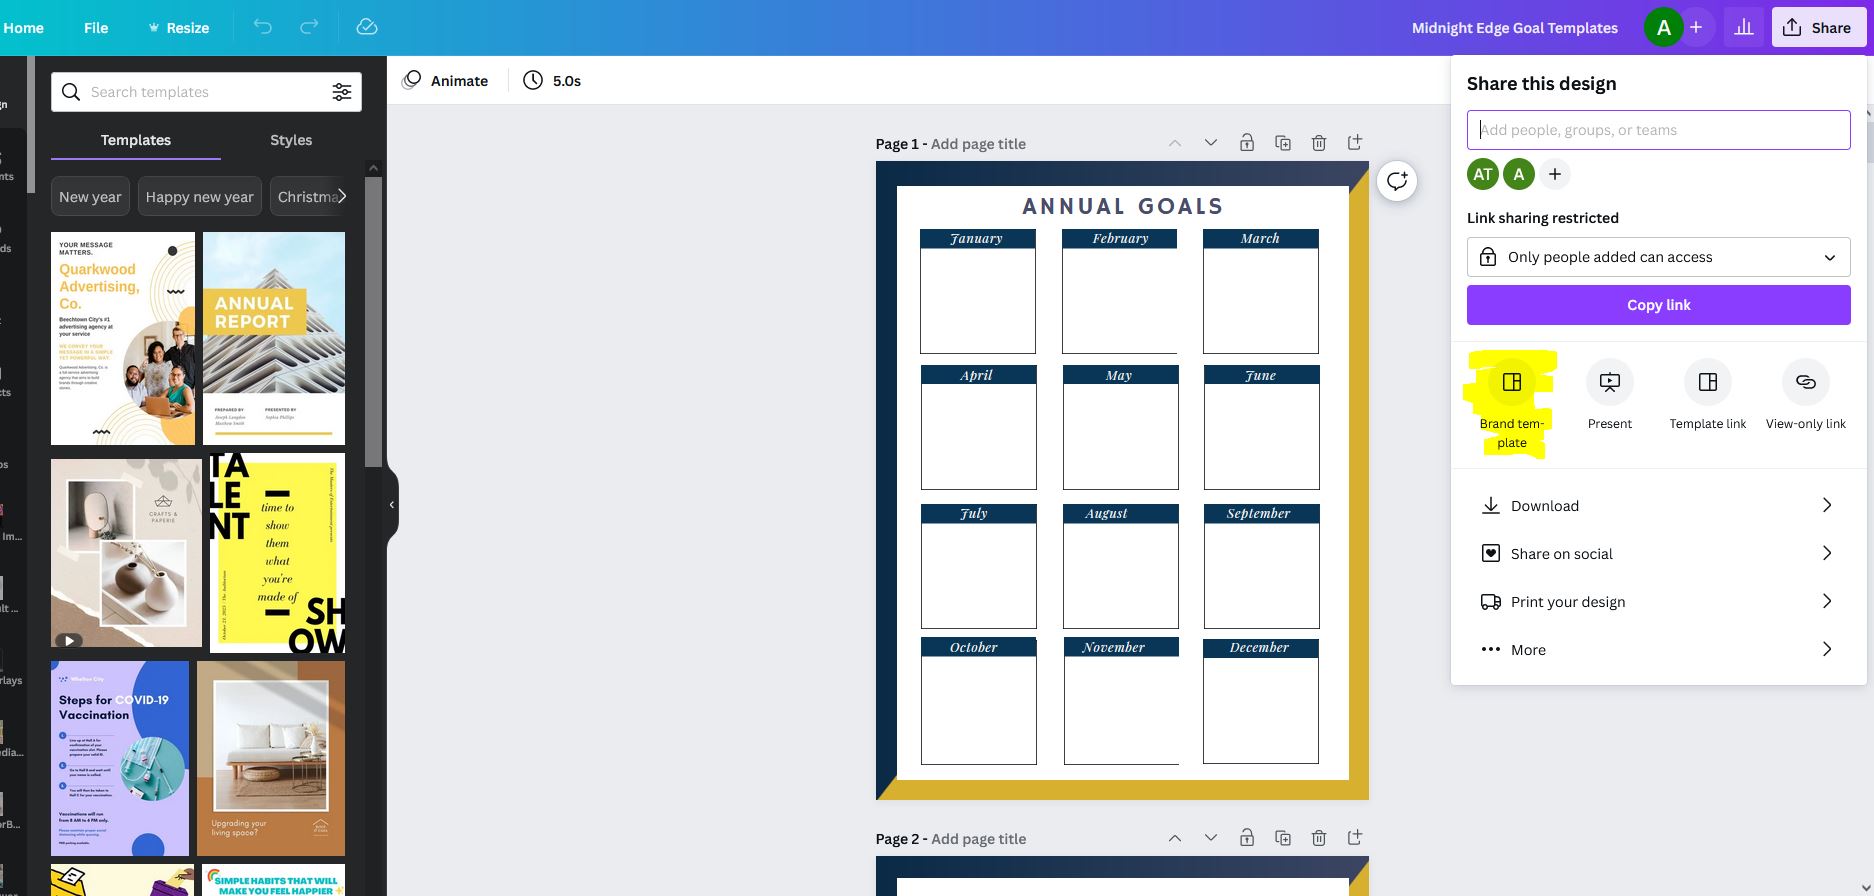
If you’d like to keep this as a brand template for your designs you go over to the right hand top side of the page where there is a Share button and click on that. Then you’ll have to find the Brand Template option. I’ve highlighted mine, but I believe before I had to scroll to the bottom where the three dots are and search in there.
Once you’ve started a new design – you’ll move on to step 3.
Step 3: Take Out Background Colors & Images
I’m going to make this completely different and to do that I need it to look different. I’m taking out the background, as well as the other images in this template.
Here is what it looks like once I’ve deleted them:
Step 4: Change the Colors & Fonts
Next, I’m changing the color. I could pick colors that I like or I could use my brand colors. I’m going to use my brand colors. These are already in my Canva dashboard under Brand, then Brand Colors.
The easiest way to do that with this is to go to the mood board on the last page and start changing the colors on that. That is all the colors throughout the template.
Once you change the color, scroll to the bottom of the color section where the purple button that says, “change all” is located and push it. That will automatically change every single color from one to the other.
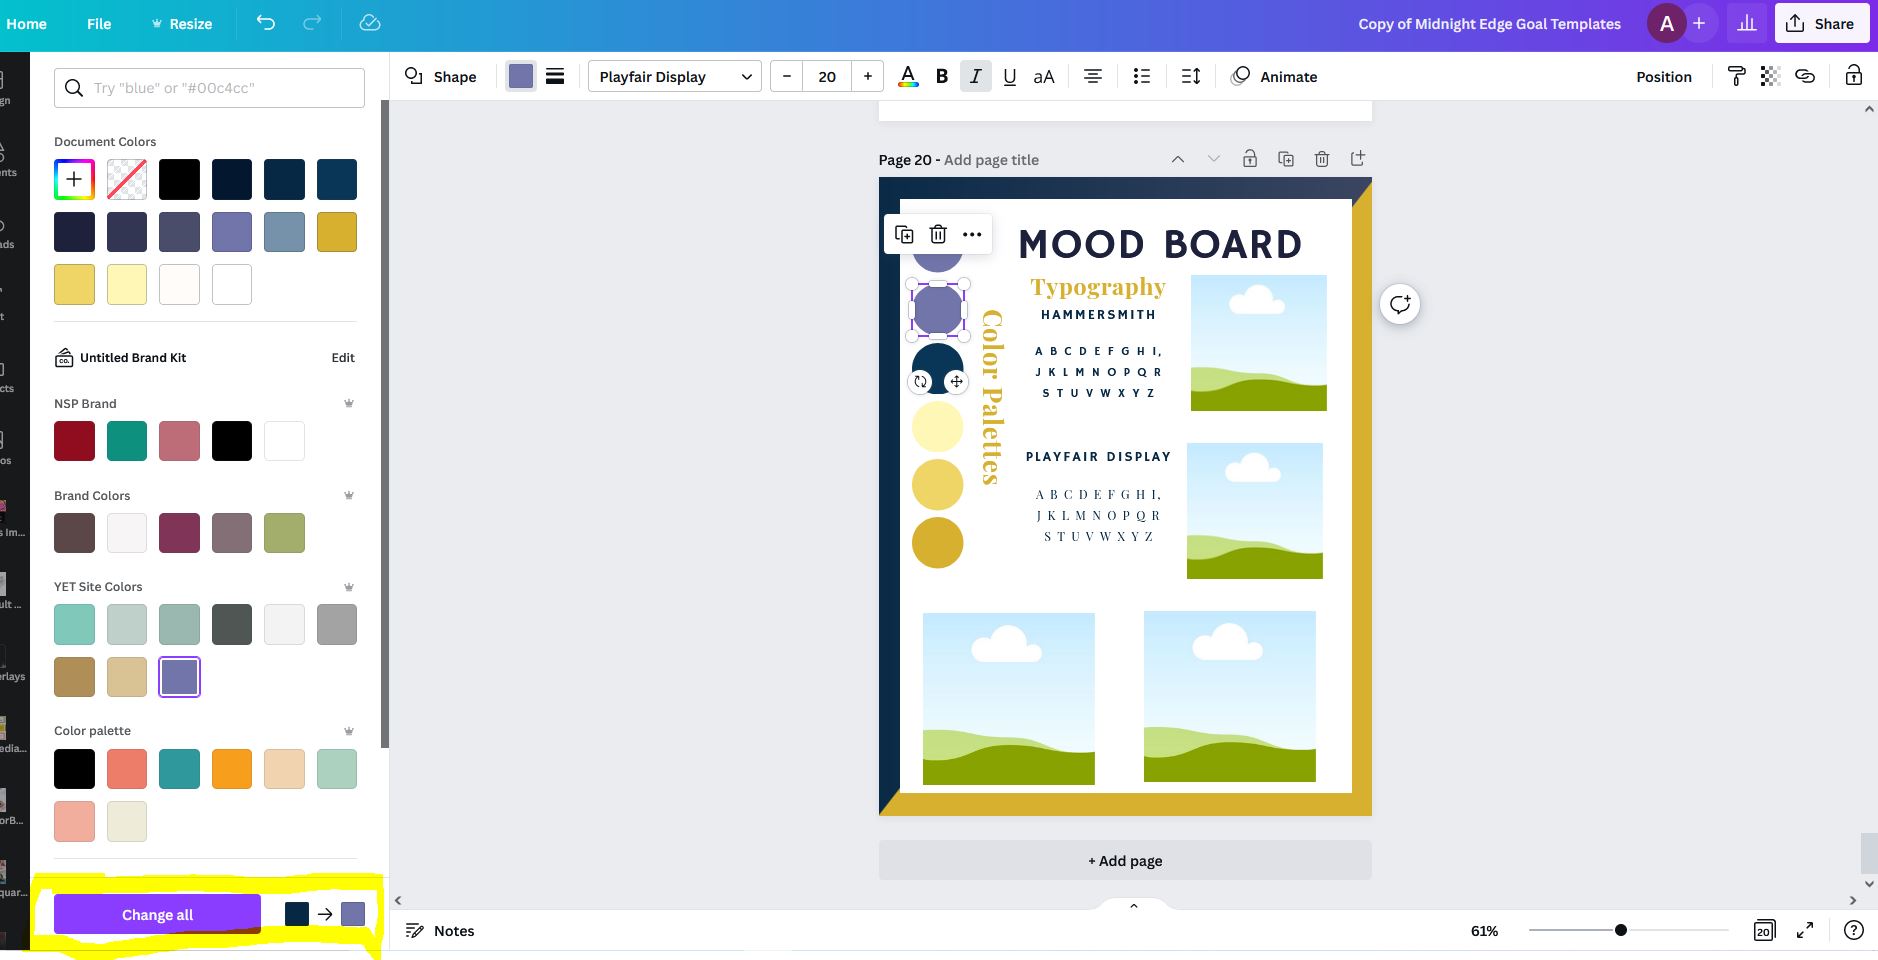
You follow that process until all the colors are changed to the colors you want.
Then you go in and change the font colors.
After you’ve changed everything, scroll out to where you’re looking at all pages and see if anything doesn’t look right. To do this go to the bottom right-hand corner and click on the number of design pages. It will automatically make it so that you can see all the pages (or as many as fits on your screen). If you look at the image above, this one has 20. Click the 20 and it will give you a grid view.
Look for lines, fonts, checkboxes, and elements that you might have missed the first time.
Step 5: Add Images
Now is the time you’re going to want to go through the page designs that you want to use an add any images where you need them.
You can add photos that work with the product or clipart.
I’ve decided to leave my freebie clean, so I didn’t add any image or clipart elements to what I’m working on.
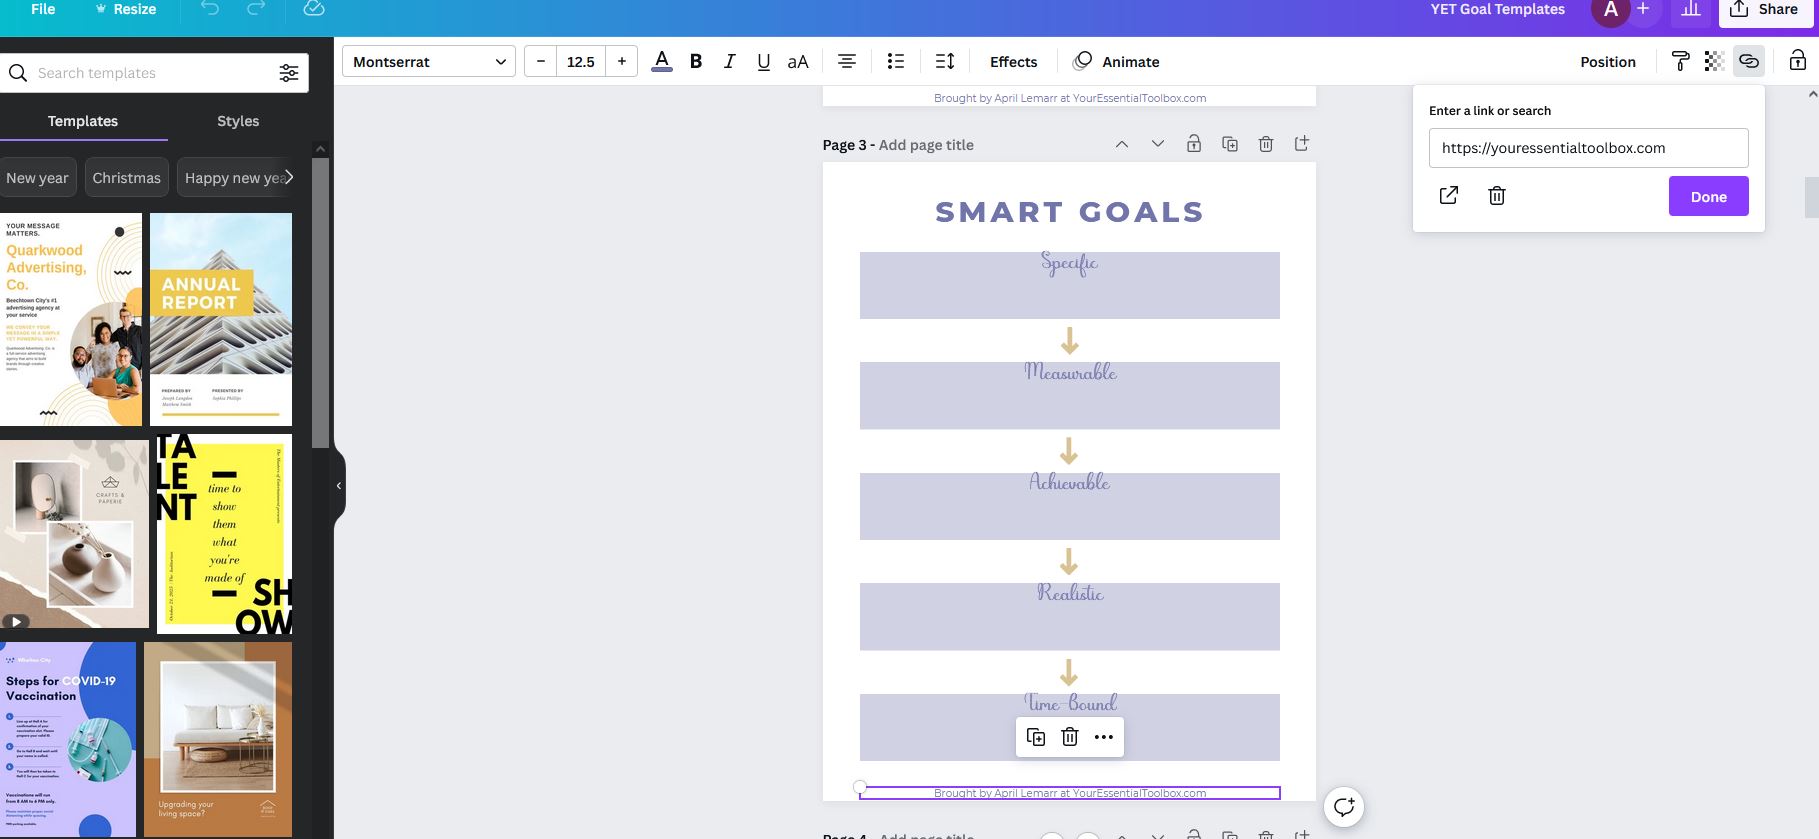
Step 6: Add Your Site URL (If Appropriate)
You want to make sure that people can get back to your site. At the bottom of the 5 page designs that I’m using I added:
Brought To You By April Lemarr at YourEssentialToolbox.com
I centered it and linked the site URL to the home page. To link something inside Canva you highlight the words you want to link, go to the right where you find a link image, click on that, add your URL, and then hit done. This does not change the color to let your audience know it is a link. You have to highlight the words you linked and then manually change the colors.
You don’t want to do this all the time. If I was making a planner, I wouldn’t add my info to every page.
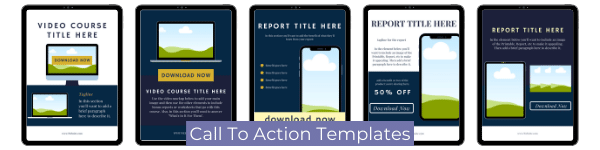
[OPTIONAL] Step: Promote a Product
My Goal Printables are essentially done. I need to make this into PDF format, but first I want to give you an optional step. You could do this in two different ways.
- I could add a call to action on the page(s) of the printables and then link to the page that I’d like to promote. This is the easy way.
- I could add a call to action page on the end of the printable that focuses on the product I’m promoting. If you have any of my Canva Template Toolkits they provide these pages (except for the Harmony Canva Template Toolkit – it doesn’t have any).
This is what a call to action page would look like:
Since I’m trying to make this simple – I’m not going to do that. I’m going to add a call to action on the bottom of each page instead.
I went very basic and this is what I’m adding:
![]()
As you can see I didn’t change the color of my site, but I did for the templates. I want people to know that they can click on that link and it will go somewhere.
I also created a PrettyLink for the CTA. You can do this for a lot of reasons (one is tracking), but I did mine because I’m working on a Shopify store and once it is done I want the printable to point to my product page on the store and not the individual Toolkit. Now all I have to do is go in and change the link.
Step 7: Create a Canva Design to PDF
In this I was going to teach you how to delete pages you didn’t want and then create a PDF from what is left, but I decided that if I want to use any of the other printables I didn’t want several different Canva design documents. I can easily pick the pages I want to make into a PDF, so that is what I’m going to show you how to do.
First, go to the right-hand side and click the SHARE button. When you do, you’ll get a dropdown menu. Click on the word, “Download”. Now you get to decide how you want your finished product to be. I want mine to be a PDF with certain pages. So I’m going to walk through each section and fill it out to represent that.
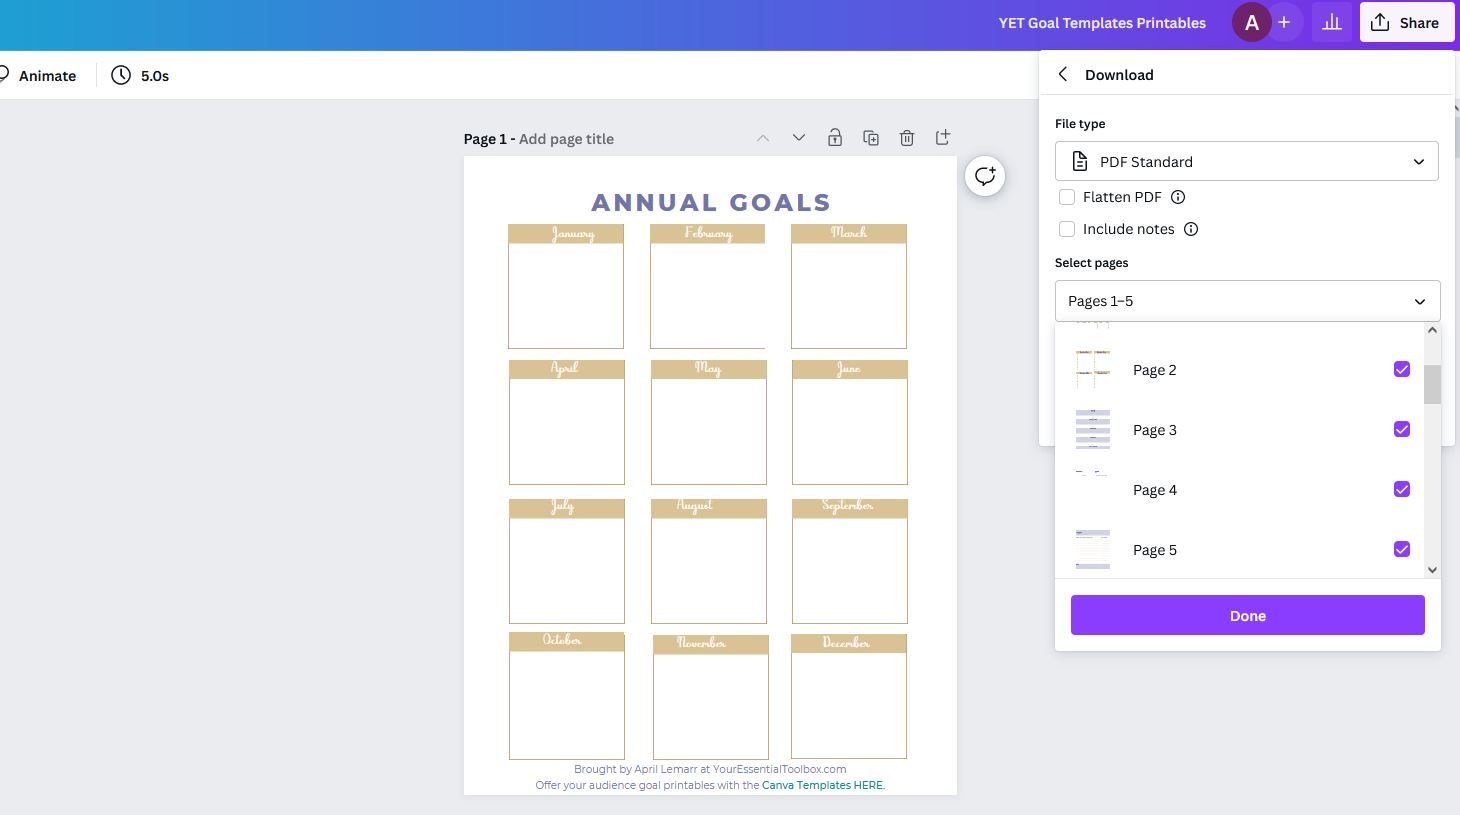
(TIP: In my first PDF I hit the Flatten PDF button – do not do that! The links weren’t clickable and I had to go through all the steps and figure out why. 🙂 )
How To Download Canva Design
Once you’ve filled out what you want you to click the purple Done button at the bottom. After that you’ll have to click one more button which is the Download.
You have to see this:
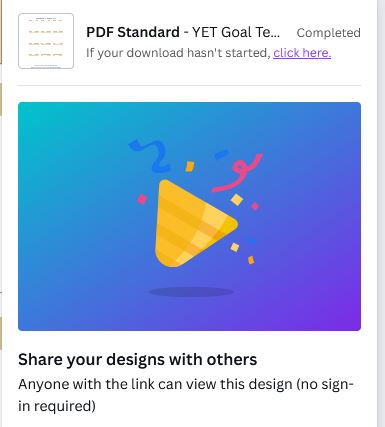
Otherwise, it is not downloading and you’ll have to start again or hit the download button. I’ve done this multiple times. 🙂
Step 8: Make Sure Everything Looks Good & Test URLs
Now that you have it downloaded, you’re going to go find and open it.
Look at the pages to make sure that they look like they’re supposed to. If they do, click on every link to make sure it is clickable and that it goes where it is supposed to go.
Once you’ve done both of those and the links are good – then you just need to set up the content upgrade through your email software. I use Convertkit. I’m making an opt-in form and adding it to the bottom of this page.
Before I do that I need a mockup for the form.
Step 9: Create a Mockup
The easiest way to do this would be to use a Cavna Template Mockup. If you’ve purchased any Canva Template Toolkits from my shop you probably already have them. All you need to do is go to the template design you want to use.
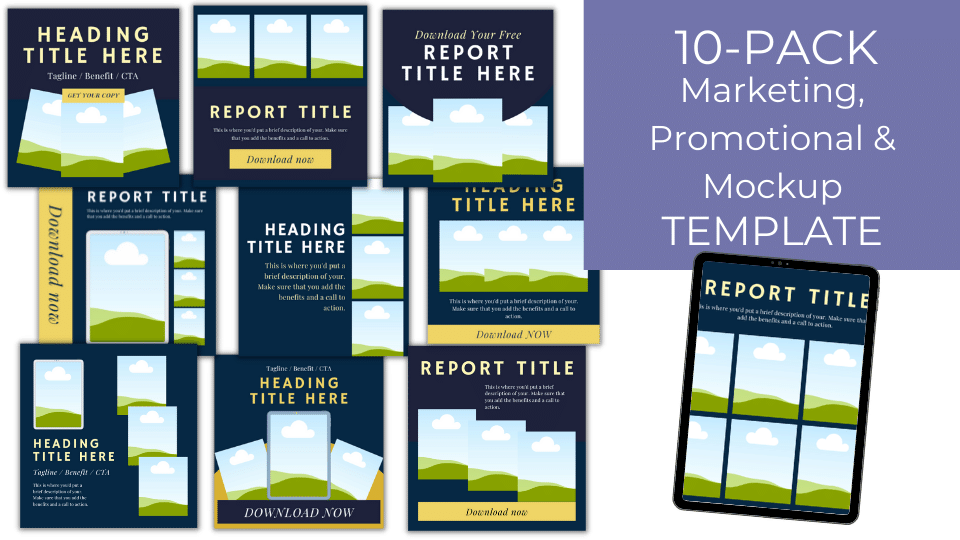
You can use one of the Social Media Mockup Templates you get in the Midnight Edge Canva Template Toolkit:
Now you’re going to download PNG or JPEGs of the Canva design pages you just created and upload the images into a Canva Mockup template. Once all of the pages are on the design the next step would be to make a shadow on each page design.
Create Canva Design Mockup
Your second option is to create your own Canva Design Mockup.
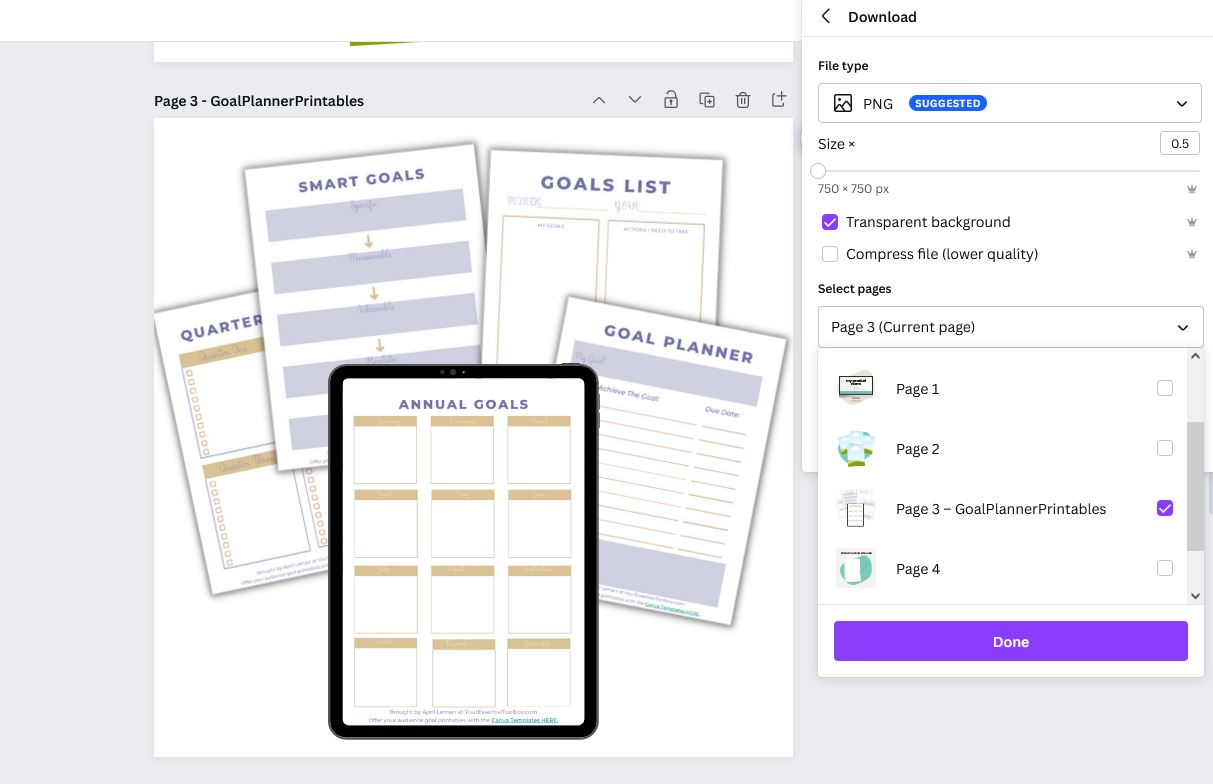
Start a square Canva Template (I normally use 1080 px X 1080 px – so that it is easy to share on social media platforms), upload the images into Canva, and then take those images and re-arrange them on the page until they look good. After I have the images on the page I would make a shadow on each so that they look good.
Once you’re done with that you need to download it. I normally download PNG, half the size of the image, and with transparency.
Here are the settings I use:
For my mockup, I didn’t use one of the templates in the Midnight Edge Canva Template Toolkit, but I could have easily. If I did I would have picked one that spotlighted pages and one that I felt looked the best. For my freebie, I felt that with this type of mockup, I didn’t need all of the color.
Step 10: Set Up The Printables In Your Email Software
After you’ve created a PDF you’re going to set up either a landing page or form through your email software provider. I plan to use my printables as a content upgrade, so all I need is a form that I’ll add to the bottom of the blog post (it should already be there).
ConvertKit offers an opportunity for people to create an account and create free landing pages and forms. So if you don’t have an email software provider yet – I’d check it out. On the free account, they do not allow sequences, so you won’t have the option to do a welcome series or a follow-up series, but you can deliver the PDF in an email.
When you do this, don’t forget to go through all the steps. You’ll want to make sure to deliver the PDF either through email or a welcome page.
~April
P.S. If you’d like to grab the Canva Template Toolkit that I used in this blog post GO HERE to grab them. (HINT: If you sign up for the printables below you’ll be taken to the same Toolkit, but you’ll get a discount for being a part of my audience. 🙂 )